Modern filter baskets have enabled a dramatic leap in the extraction yields possible with espresso. In the process, they have gone from being a fairly hum-drum accessory to becoming perhaps one of the most important pieces of equipment on your bar. In our last post, we bench-tested a few recent designs, and saw for ourselves how this seemingly simple technology can transform the extraction efficiency and the flavour of our shots.
The defining feature of this new wave of high extraction filter baskets is the pattern of holes at the bottom of the basket. Manufacturers have completely re-thought the way these are laid out, to ensure even extraction right up to the edges of the puck, and to enable faster flow through the coffee bed. In turn, this allows the barista to use finer grind sizes and achieve considerably higher extraction yields. However, to judge by their hole patterns, the baskets we tested take radically different — and seemingly contradictory — approaches to maximising flow.
Different hole patterns in baskets
To try and understand this contradiction, we reached out to Professor Abbott for help in analysing the hole patterns of our filter baskets. He responded by creating a brand-new app for us — the Basket Hole Analyser.
Armed with this app, you can analyse the size distribution, hole placement, and the total open area of the holes at the bottom of your basket. You can also verify for yourself some of the claims that manufacturers make about their baskets. Are your baskets truly identical? And how much variation in size is there from one hole to the next?
Professor Abbott’s app builds on earlier work by Robert McKeon Aloe — take a look at these fascinating posts where he compares the build quality of different baskets. The app uses much the same technique as McKeon Aloe’s analyses, but enables anyone to do this kind of analysis for themselves. We’ll explain how to get the best possible results from the app later in this post — but first, let’s explore some of the results of our measurements.
The Paradox of Modern Baskets
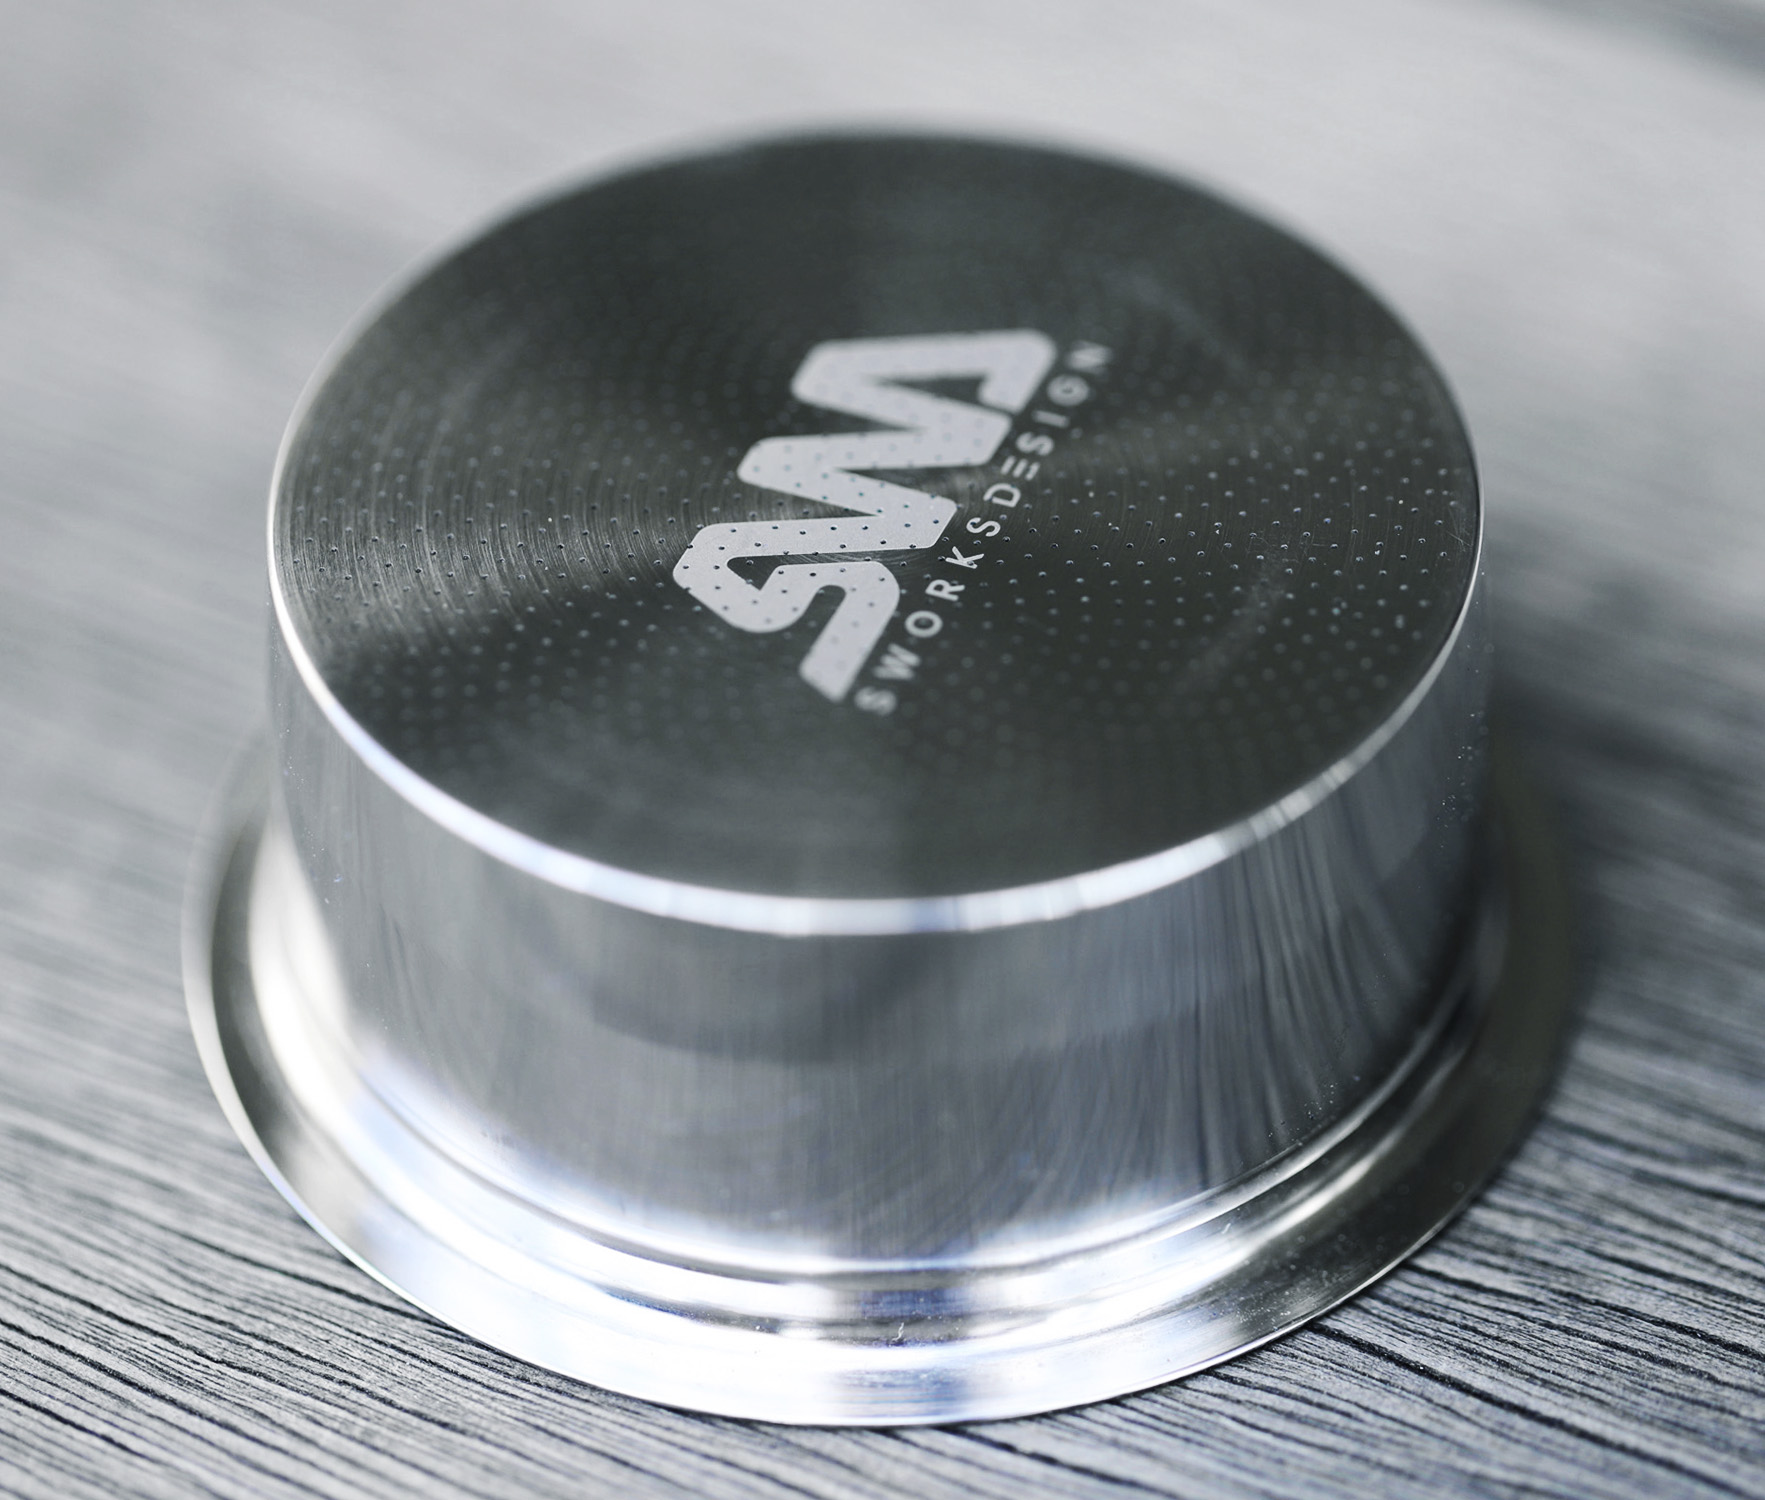
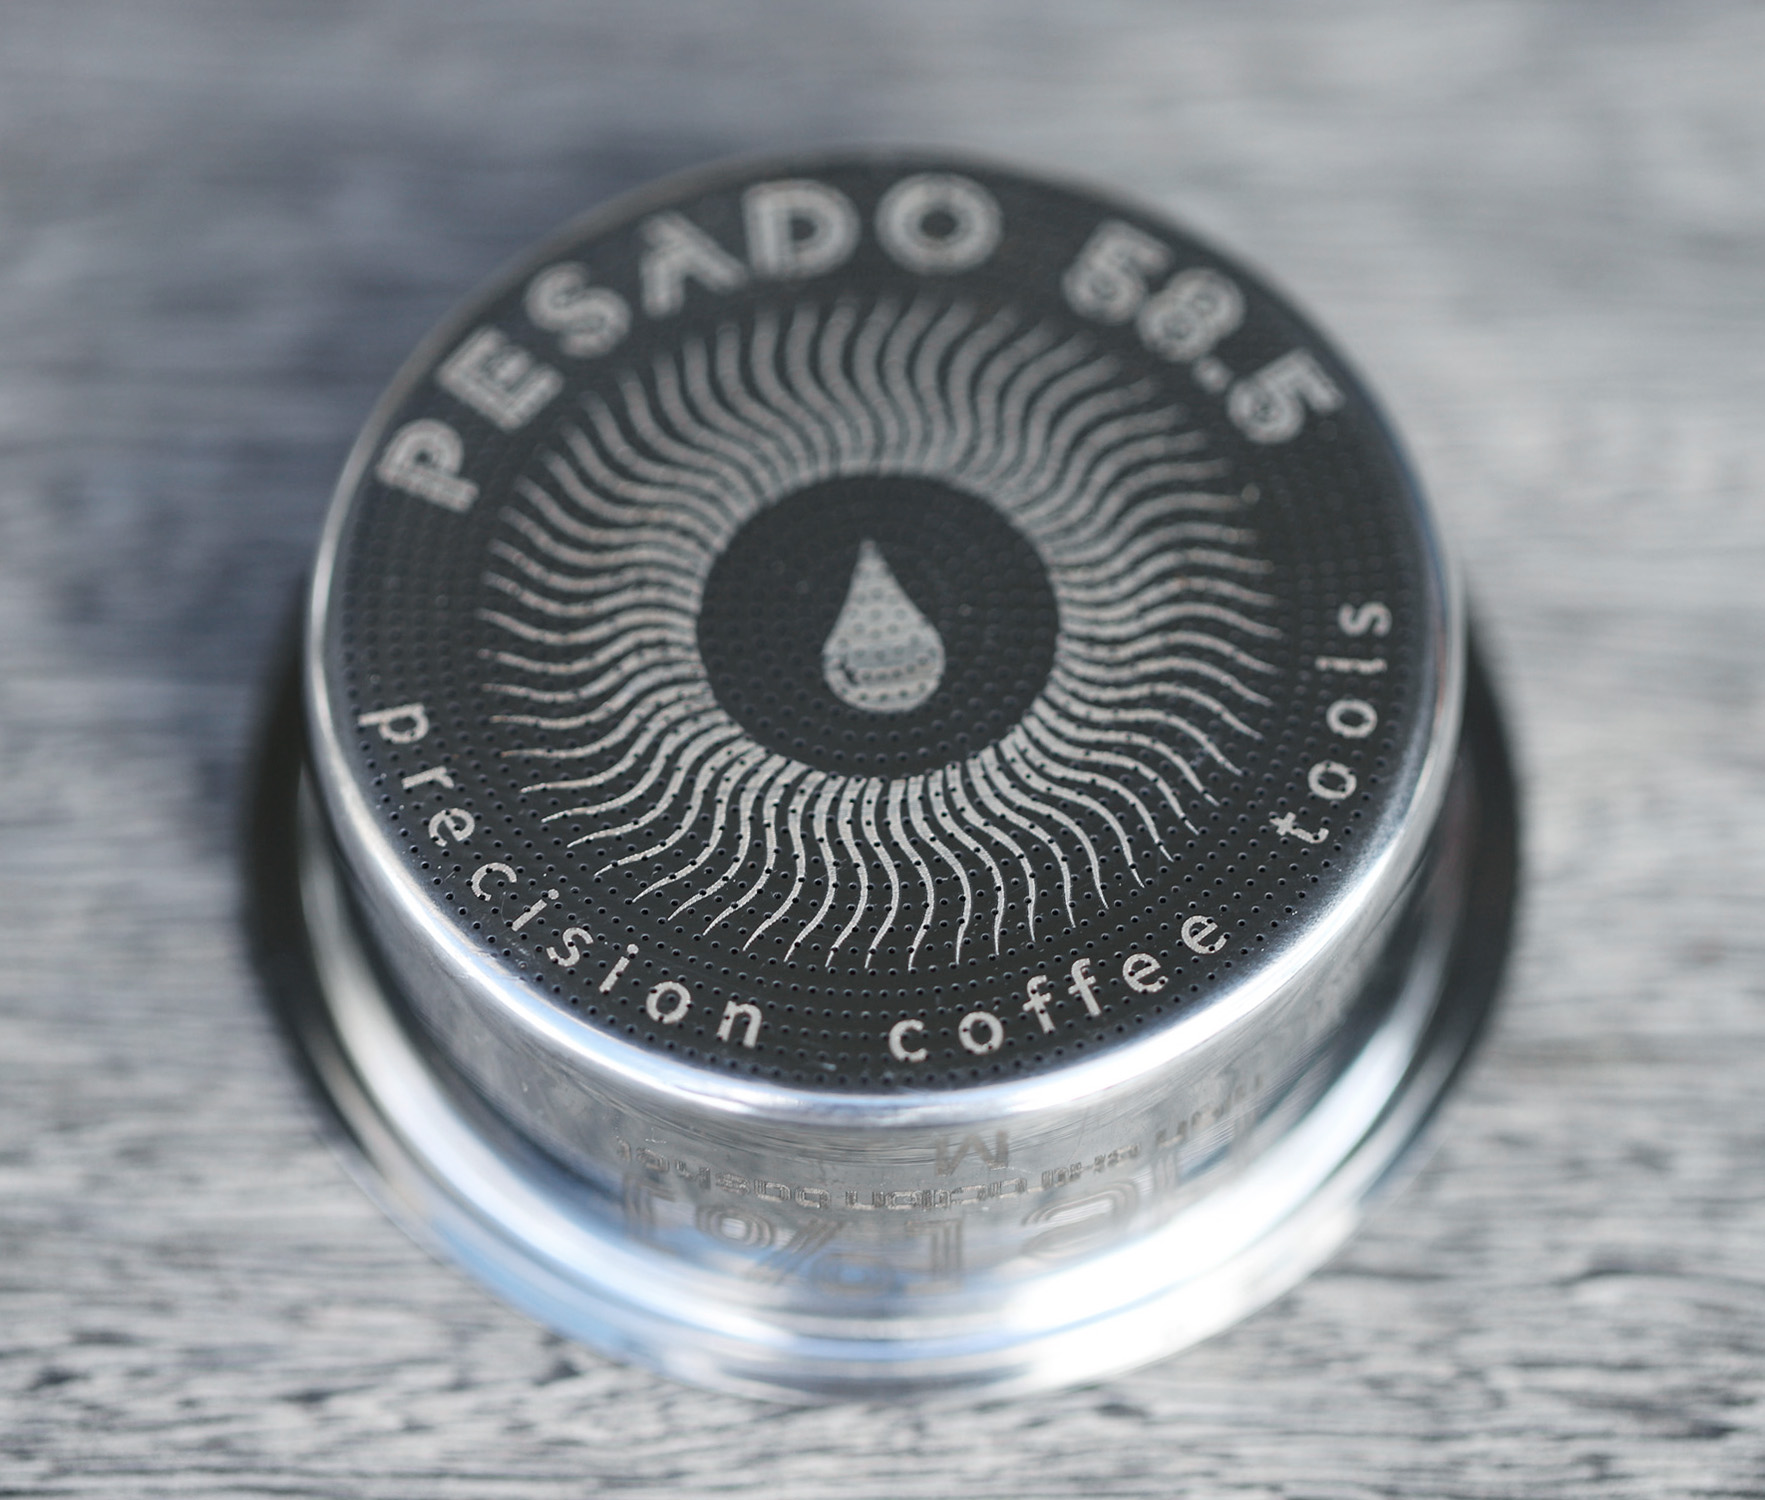
The results of our tests of modern filter baskets were very clear: the new designs allow higher flow rates and hence, higher extractions. What surprised us, however, is that the baskets achieved this in very different ways. The Sworks Billet baskets enable fast flow by having large numbers of tiny holes, while the Pesado HE% baskets rely on large, closely-packed holes to maximise the open area at the bottom of the baskets.
Sworks Billet basket (left), Pesado HE% basket (right)
Analysing the baskets we tested in the app, we can see that the tiny holes of the Sworks Billet basket make for a total open area of 4% — barely more than the IMS baskets we used as a baseline. The large holes of the Pesado, on the other hand, make up an extraordinary 14% of the total basket area. These two baskets get quite similar results, in strikingly different ways.
You might expect that the different hole sizes and open area of the baskets would result in them putting up different amounts of resistance to the flow of espresso — but in fact, that seems to be of little importance. The reason for this is that the resistance to flow from the puck is much bigger than the resistance to flow from the basket itself, so the basket resistance makes only a small difference to the total.
To put this in mathematical terms, the total flow rate (![]() ) through in an espresso can be given as
) through in an espresso can be given as ![]() , where Tb is the flow rate you would get through the basket alone, and
, where Tb is the flow rate you would get through the basket alone, and ![]() is the flow rate you would get through the coffee puck. Since the flow rate through the basket with no coffee in (
is the flow rate you would get through the coffee puck. Since the flow rate through the basket with no coffee in (![]() ) is much higher than the flow rate through the coffee puck would be (
) is much higher than the flow rate through the coffee puck would be (![]() ), changing the flow rate through the basket has very little effect on the overall flow rate.
), changing the flow rate through the basket has very little effect on the overall flow rate.
So it seems that the high flow from modern baskets isn’t because they themselves have low resistance, Instead, the basket design seems to interact with the puck itself — partly because the baskets allow flow much closer to the edge of the puck, but perhaps also because the design of the holes somehow prevents them from getting clogged by coffee particles.
Exploring Basket Quality
As well as showing the hole size and total open area, the app also lets us see how even the size and spacing of the holes in a basket are. It seems reasonable to assume that the more uniform the holes, the more even the extraction across the puck.
With the app, you can visualise the differences in hole size and spacing across a basket, represented by the holes being given different colours. When we plug in our photos of the Sworks and Pesado baskets, we can see that the size of the holes is fairly even in each, as you would expect from well-made baskets.
In Location Variance mode, however (enabled by checking the box marked ‘L-Variance’), you can see a conspicuous difference between the designs. The Sworks holes are placed in a Fibonnaci spiral, so that the spacing between holes is very similar all the way across the basket. The Pesado holes, on the other hand, are placed in concentric rings. The hole spacing in each ring is measurably different, resulting in a riot of colour in the app. What effect on this might have extraction quality remains to be determined.
How to Photograph Your Baskets
If you want to use the app to check on the build quality of your own baskets, the hardest part — and by far the most important — is getting the image right. As Professor Abbott puts it, “image analysis is 10% the analysis and 90% the image”.
The app needs a high-contrast photo of the inside of the basket, with the holes backlit, and no other light or reflections visible. To get this sort of photo, you’ll need a high-resolution camera, ideally with a telephoto macro lens, and a tripod that allows you to position the camera vertically over the basket. With a wide angle lens such as a phone camera, the holes at the edge of the basket may appear smaller than the holes in the middle, because of the angle the light must pass through to reach the lens.
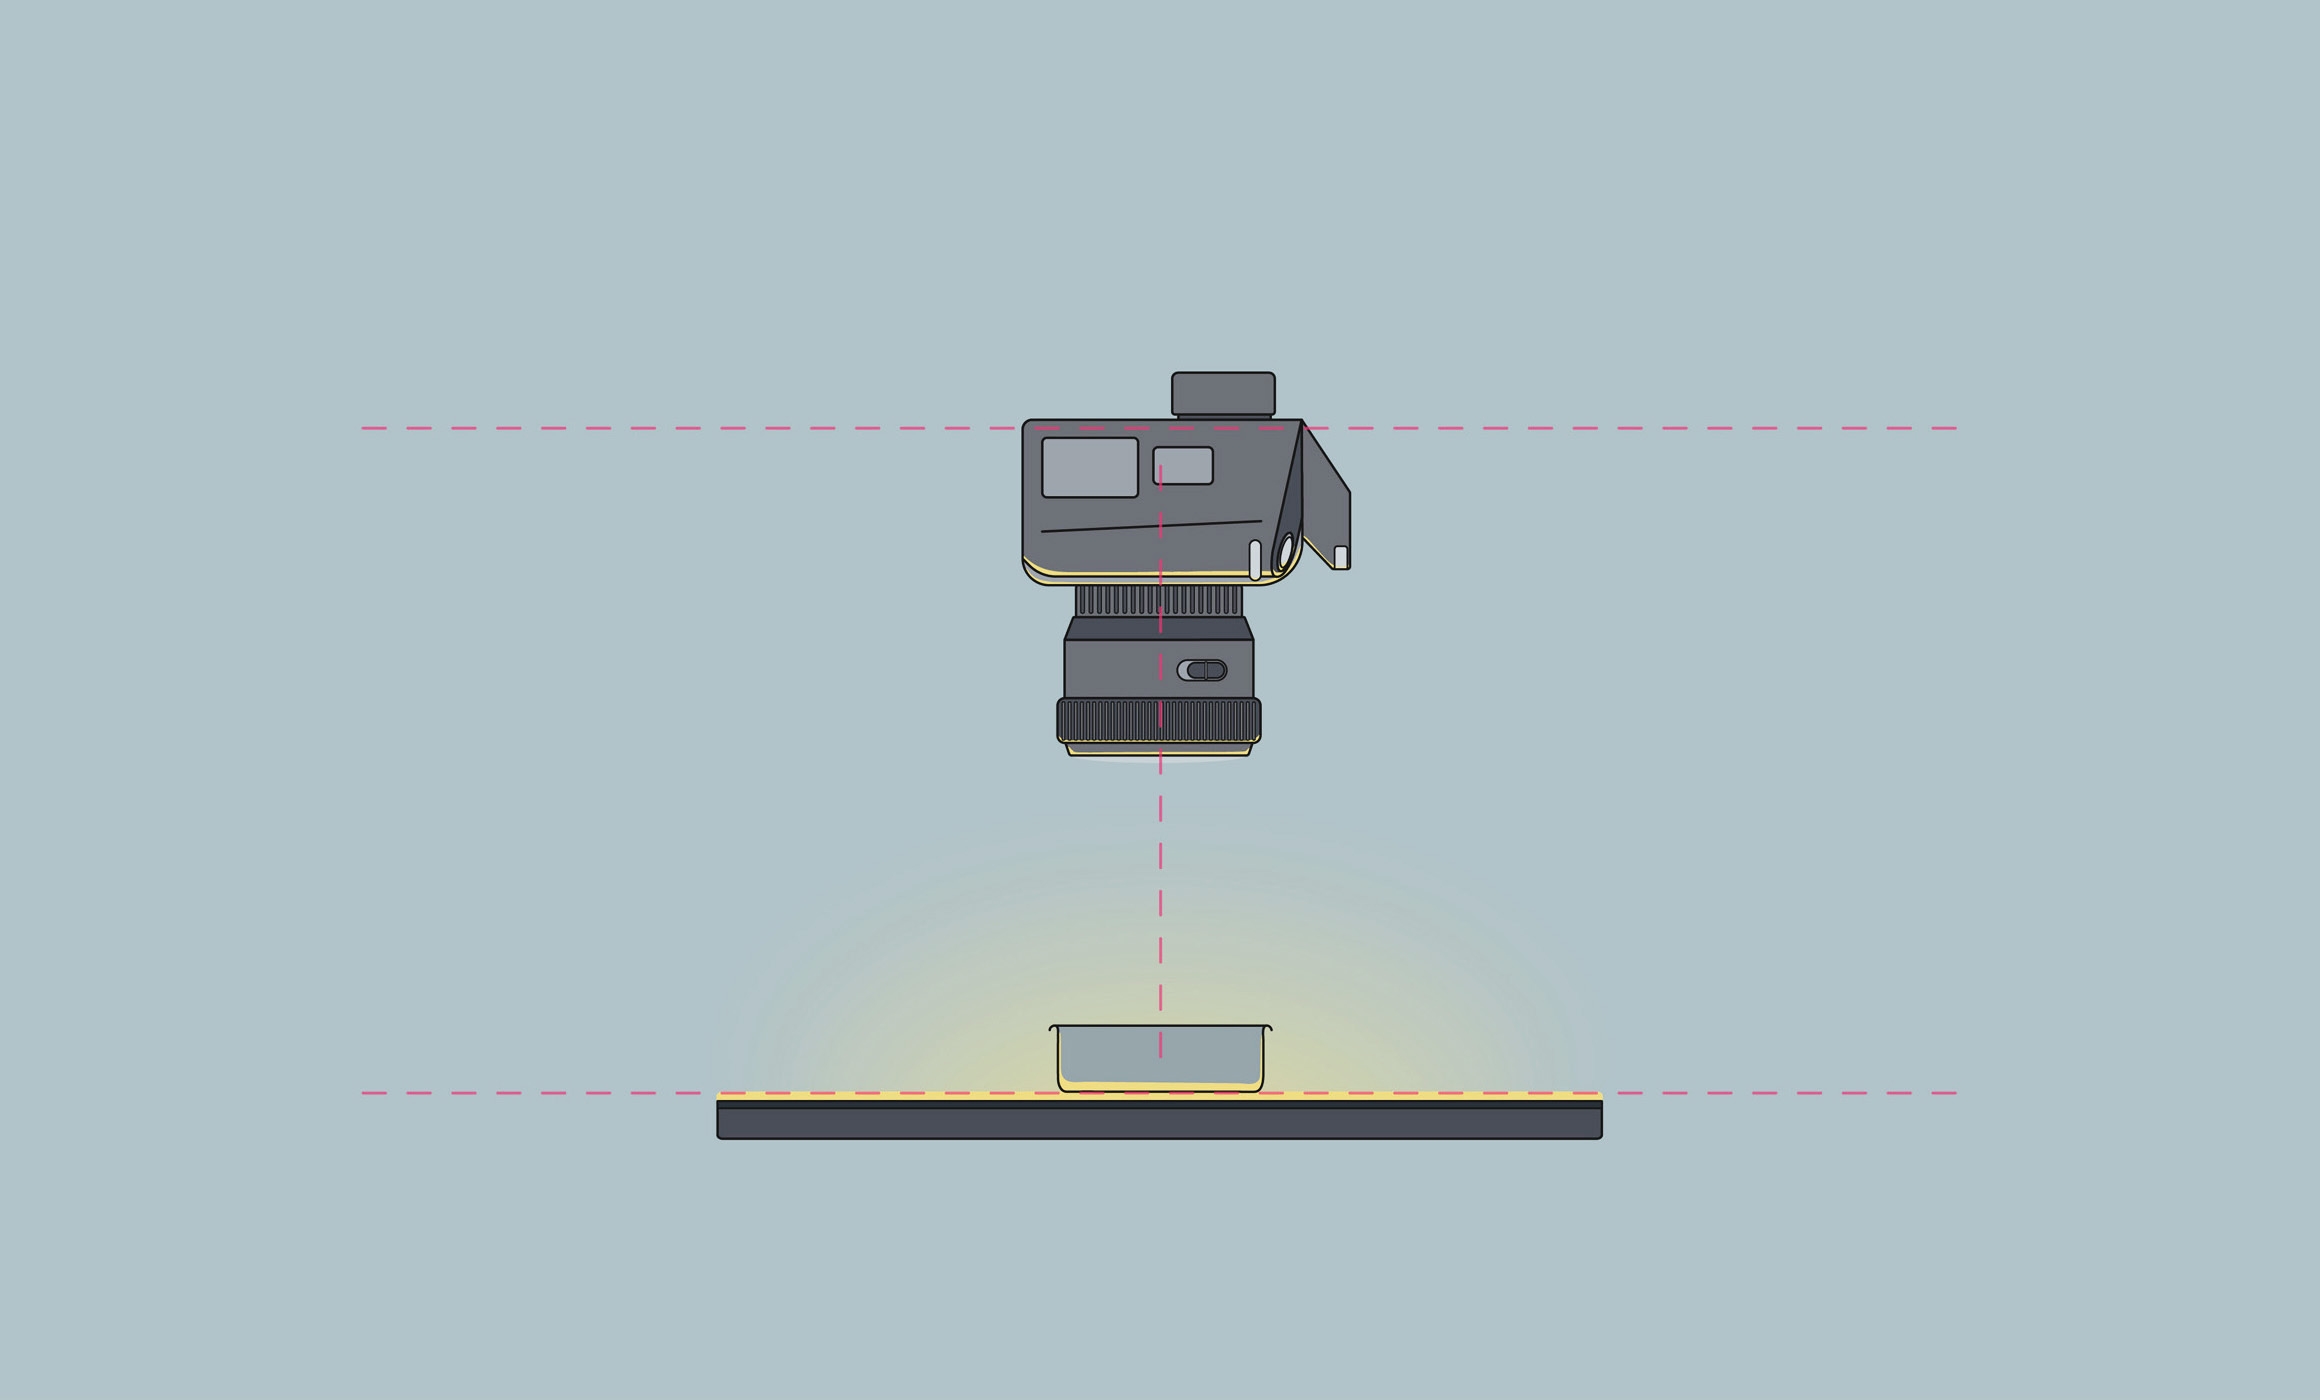 Take special care to align your camera well before shooting your basket
Place the basket (with the bottom facing down) onto a backlit surface. A lightbox would be ideal, but you could also use an iPad or phone screen with a white background. To eliminate light seeping in from the sides, cover the rest of the screen with cardboard, with a hole cut in it so that it only allows light in through the basket holes.
Place the camera on a tripod, and aim it down vertically at the basket. Use a spirit level to ensure that the camera is pointing directly downwards. If you are able to adjust the settings on your camera, use a narrowed aperture (F8 or less) to ensure a high depth of field; you may need to slow down the shutter speed to capture enough light.
Before taking the shot, you’ll also need to ensure that no external light is coming in by darkening the room or covering the camera with a sheet. If you are using a slow shutter speed, do your best to avoid creating any vibration that could affect the shot.
Take multiple shots of each basket, rotating the basket in place each time. If you see that one side of the basket has smaller holes than the other, this can be an artefact of the camera angle not being completely vertical. Rotating the basket will let you check if any differences in hole size you see are due to the camera angle, or a genuine difference in the basket holes.
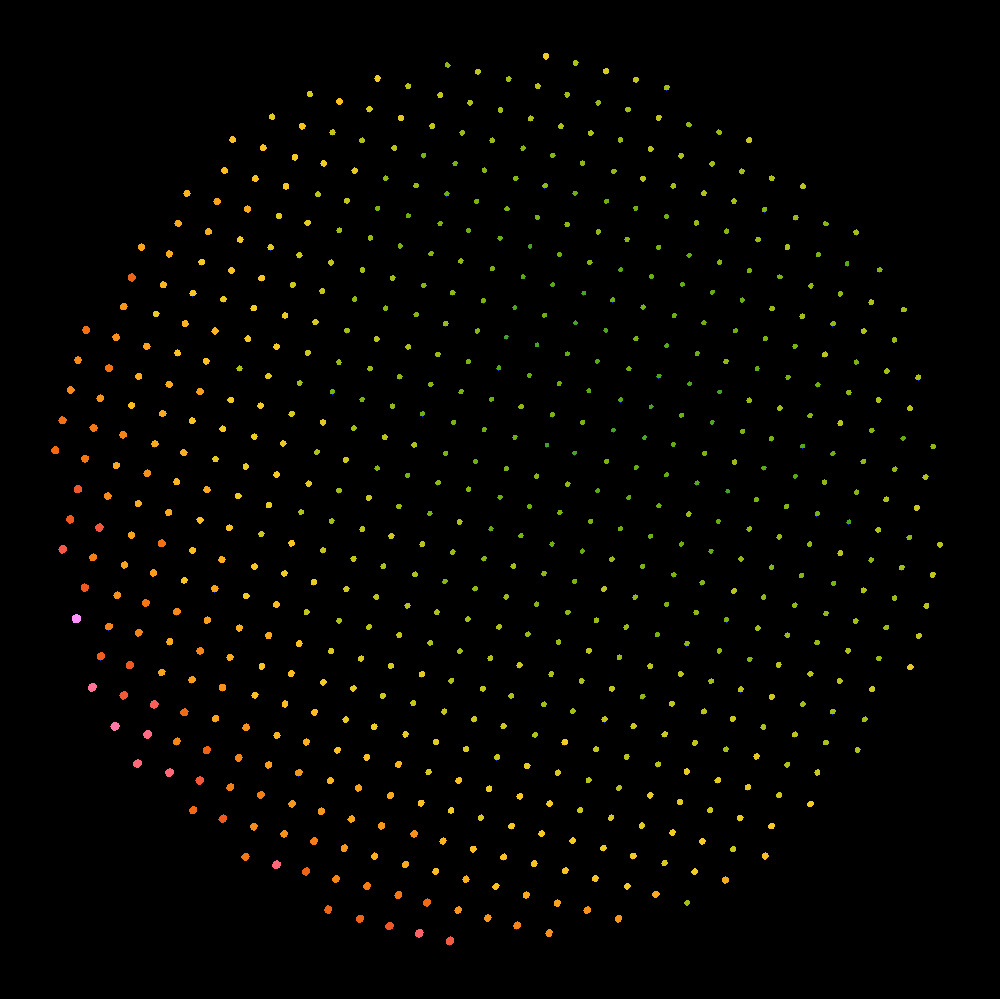 Larger holes on one side of the basket could be a manufacturing error, but is more likely to be an artefact of the lens being positioned closer to that side of the basket. To determine if it is an artefact or a real difference, take several images and rotate the basket each time.
The last step is to check the size of the basket base. The easiest way to do this is to replace your brew basket with a ruler, positioned so that the scale lines up with where the centre of the basket had been. Without making any adjustments to the camera, take a picture of the ruler, and compare this picture to the pictures of your basket in order to gauge the size of the basket base.
Alternatively, you could try pressing paper into the bottom of the basket and taking a measurement from that, or even turning out a dry puck from the basket and measuring the bottom of that. Don’t get too hung up about this measurement, however. As Professor Abbott explains: “Uniformity and reach up to the edge are more likely to be important [than the exact size], so we don’t have to worry too much.”
Once you’ve taken the photographs, use an image editor such as Photoshop to remove any reflections that did sneak into the image. Crop the image so that the edges of the image line up exactly with the bottom of the basket. Finally, increase the contrast to maximum, and the image is ready to upload to the app.
An Alternative Approach
Another way to get a picture of the basket holes is to use a flatbed scanner. This will only work well if the base of the basket is perfectly flat. Many baskets become slightly bowed out after use, so it’s best to use this approach with brand-new baskets only.
Place the basket directly onto the glass plate (scan bed). Lay a couple of layers of baking paper on top of the basket to diffuse light. Hold a powerful flashlight about 30cm above the basket, and start the scan.
Once you have loaded the scan onto your computer, open it up in Photoshop and lower the midtone levels and increase contrast as much as possible. Then tidy up the image by selecting all the individual holes with the magic wand tool (a tolerance of 10–12 worked well for us) and filling in the rest of the space with black to eliminate any reflections on the basket itself.
Handling Blocked Holes
Some modern baskets seem to be especially prone to becoming blocked by coffee particles. If you want to try and clear these blockages out before taking a picture, then McKeon Aloe suggests trying compressed air, an acupuncture needle, or even an ultrasonic cleaner, depending on the basket design.
For our analyses, where we did find a blocked hole, we simply replaced it with an unblocked one in Photoshop. It’s pretty much unheard-of for modern baskets to have unpunched holes, so we’re confident that any time a hole doesn’t show up on our photo, it’s either a blockage or some other artefact.
However, Abbott’s advice is simply not to worry too much: “In terms of data analysis of open area, I don’t think a blocked hole matters a damn,” he says. “If 1000 holes have an open area of 2.00% then an analysis with 5 holes blocked gives an area of 1.99%. Errors in lighting/thresholding are likely to give differences larger than that.”
Analysing Your Baskets
Once your photo is ready, you need to upload your photo to the app, then enter the internal diameter of the basket. If you want to compare multiple baskets, then it’s essential to use the exact same setup for the photos of each one. Even minor differences in the angle or distance from the lens can affect the analysis, making the comparison invalid. Keep this in mind if you are comparing your results to ours (or anyone else’s).
Once you’ve plugged in your photos, then you can follow Professor Abbott’s instructions in this video to see the different data the app can pull from them.
For us, the data we get from the app really drive home how incredibly precise the manufacturing on the new wave of baskets is. The increase in extraction yields that this makes possible is substantial.
While a new set of baskets might seem like a big investment, compared to the low cost of traditional baskets, the high extraction means that you can use slightly less coffee to make espresso at the same strength — and get tastier shots to boot. When you calculate it this way, a busy cafe can make up the cost of a pair of 200 dollar baskets fairly quickly.
If you’re not convinced, try using the app to analyse the baskets you’re currently using. How evenly sized are the holes? How much of the edge of the puck isn’t getting extracted properly, because the holes don’t reach there? Armed with this information, perhaps you’ll find it’s time to start raising your expectations of how well-made a basket should be.






0 Comments